
Terraform by Hashicorp is an awesome tool that allows you to define your system architecture as code using a json language variant.
With Terraform you can:
- Define your architecture as code in simple text files rather than manually tweaking things in your cloud provider
- Store your architecture definition in a source control repo and have a complete revision history over changes made
- Deploy resources to multiple cloud providers
- Preview changes to your architecture before deploying
- Work in an iterative way, deploying and tearing down complex cloud architectures in minutes
In this blog post we'll use terraform to define a WordPress website and deploy it to AWS. We are going to create:
- A standalone EC2 instance with Bitnami WordPress Multisite installed
- A security group to restrict access to the server and allow SSH from our local machine
- An elastic IP so that DNS mappings work if the server is rebooted
- A root device that won't get deleted with the instance, so that if the server dies, we still have the website data
We'll be using Atom to edit terraform files and doing all of this on windows. I usually use Linux these days, but I'm using a surface tablet to write this post so I'll use git bash prompt for the examples.
This post assumes that you already have already signed up for an AWS account, but will cover configuring your local system for use with Terraform.
AWS SDK Install
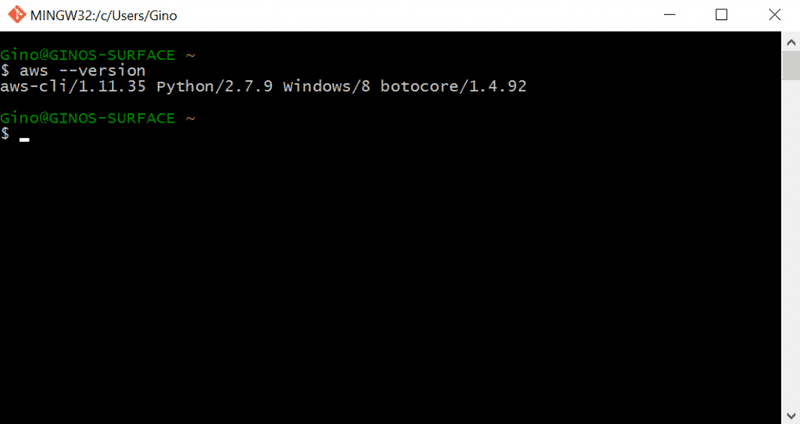
Install the AWS SDK for your local system. For windows that can be installed from http://docs.aws.amazon.com/cli/latest/userguide/installing.html#install-msi-on-windows. Once its installed open a prompt and check that the aws cli is accessible by typing aws --version.
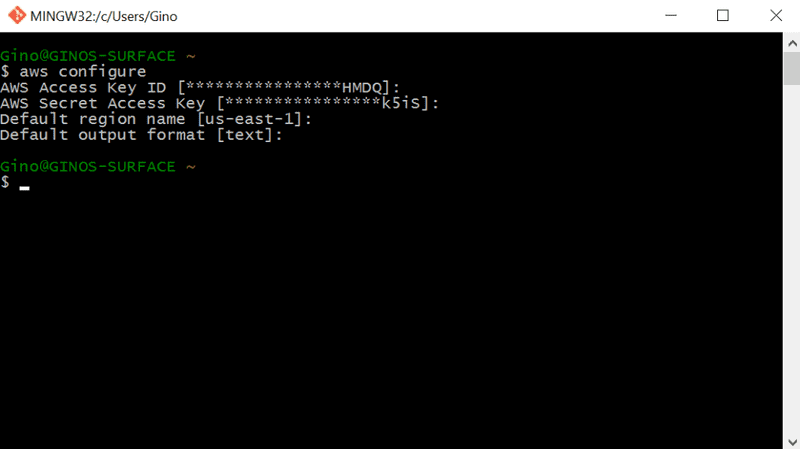
Now execute "aws configure" to configure your local environment to access aws. You will be promoted for the access key, secret, region and output format. You can generate a user account in AWS IAM and generate the access key and secret. The user should have adequate permissions to create EC2 resources. For this article I created a user with full EC2 access.
I usually use text output which is easier for bash scripting.
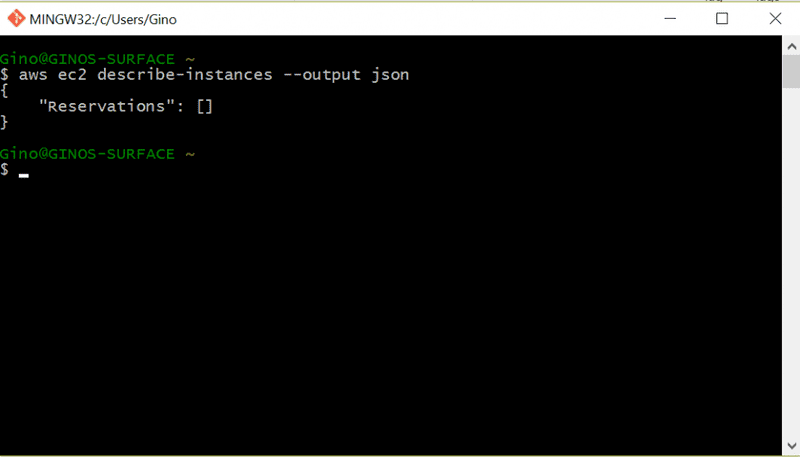
To check configuration was successful, ask aws to kindly list running ec2 instances in your default region. If this is a brand new account, or you have no instances in that region, you should see output similar to the following...
Okay, now AWS is good to go. Lets install terraform...
Install terraform
We are going to install to a directory on the C drive. So let's create a directory…
mkdir c:\terraform
Download terraform from https://www.terraform.io/downloads.html and extract terraform.exe into c:\terraform
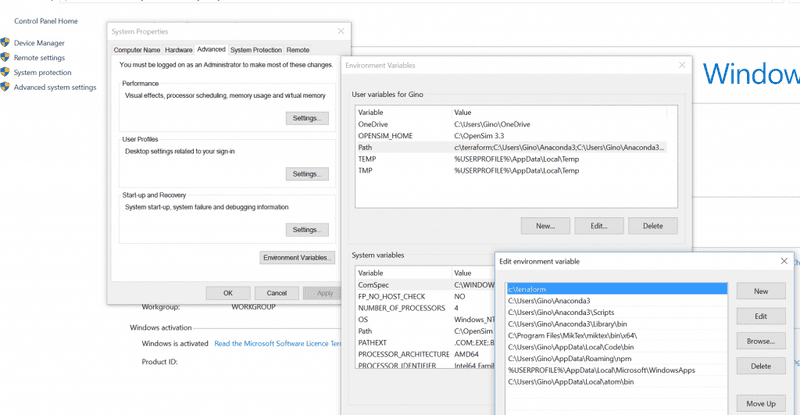
To make it easy to use terraform from any prompt. Let's add c:\terraform to your path. Go to System > Advanced System Settings > Environment Variables and add c:\terraform; to the start of your path.
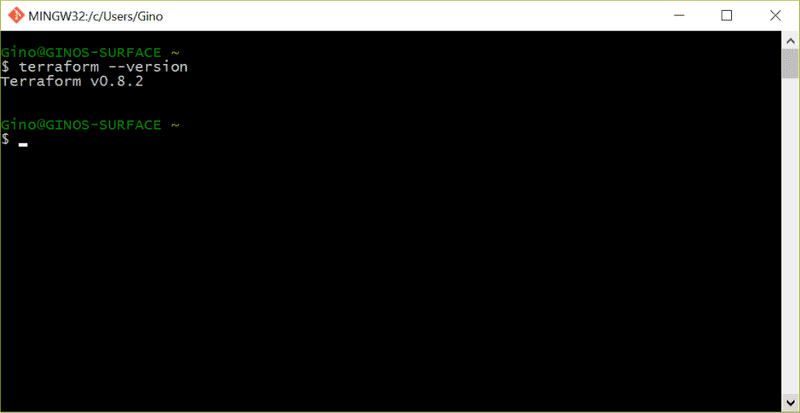
Verify the installation by typing terraform --version at the prompt.
Atom
Install Atom from https://atom.io. You may also want to install the terraform language which adds syntax highlighting for terraform files. https://atom.io/packages/language-terraform
apm install language-terraform
Also, to support reformatting terraform files on save we can use the terraform executable and a plugin called terraform-fmt. First install it.
apm install terraform-fmt
Then configure it by editing the atom config file and add the following lines (File > Config):

Now we are ready to terraform our architecture. At the prompt change to your source code directory and open atom (usually just type atom .)
Lets Terraform
Add the following files to your terraform project.
- config.tf - This is where we will configure our aws provider
- main.tf - This is the file where we will define the main resources used in the architecture, including the EC2 instances, elastic IP's etc.
- security.tf - This is where we will define security groups to allow access to our server over http and to restrict SSH access to our local IP
- outputs.tf - This is where we will define the outputs of our terraform architecture once its complete. For example this is handy if you output the public DNS of any server created.
- variables.tf - Here we list any variables used in our architecture definition. For example, this can be used to provide region specific ami ids.
Note, I'm using multiple files for code organization. It's perfectly fine to define everything in a single terraform file. Terraform is smart enough to process all terraform files it finds in the current directory and consider them as part of your solution when planning or deploying the architecture.
Let's first setup our variables...
Variables.tf
Here we define the variables that are in use in our architecture. This will cause Terraform to expect these variables when it is executed, either to be passed at the command line with the -var option, or in a .tfvars file using the -var-file option.
We will define the following variables:
- local_ip - Later on we will create a security group to allow SSH access to the server. We will define a variable for the local ip address so that it should be provided when running terraform at the command line
- region - This variable will allow us to pass the region as a variable. This allows us to conveniently pass it in the tfvars file.
- wordpress-images - This is a map or lookup variable allowing us to use specific images for a certain region. We will only be deploying to N.Virginia in this article, but I'll include this kind of variable for illustration purposes.
The image id for bitnami wordpress multi-site can be found here: https://aws.amazon.com/marketplace/fulfillment?productId=2f1d4d67-324b-41d7-8af9-b7860d269c6d.
To launch in Virginia well be using the image ami-a42d75b3. You must subscribe to this ami in the amazon market place before using it. To do this, go to the Bitnami WP multisite page in the marketplace, select the Manual Launch tab and then hit the "Accept Terms" button on the right of the page.
Here is our completed variables file...
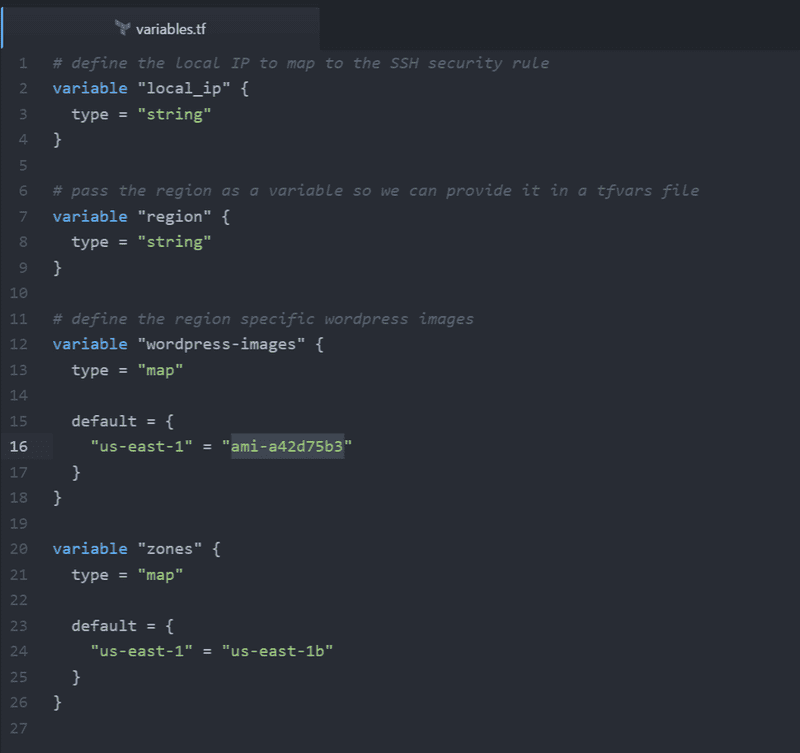
I will use a local tfvars file to provide these values so that I don't have to pass them at the command line, or check them into source control. The format of this file is shown below….

Config.tf
Here we can configure some defaults for our provider. Here we could put our access key and secret, however, it's better to let terraform use the locally configured aws profile and prompt for the region during deployment. For now we will tell terraform to use the default aws profile configured on the local system and deploy to the region specified in the region parameter. Note the user of the interpolation ${} syntax here to reference the variable we defined earlier.

Okay, lets first make sure we've considered security...
Security.tf
Add a security group resource to the security.tf file and give it an id, name and description. Our security group will contain a number of rules, so we will "outline" rather than "inline" its rules.

Now we will add rules to the security group. We will use the Terraform interpolation syntax to specify the security group the rule belongs to e.g. ${aws_security_group.wordpress_security_group.id}
We'll allow ingress on http port 80 and 443 to allow web traffic to hit the server. (I won't set up SSL just yet, but it's good to have the port open for when I do)
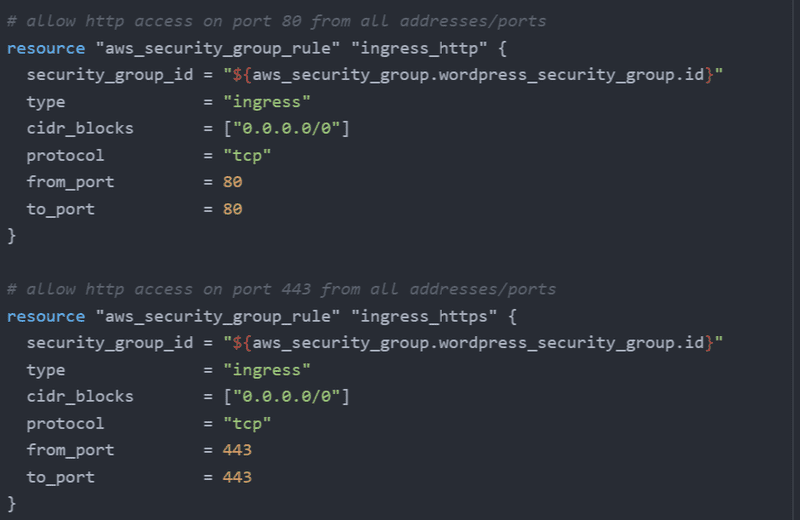
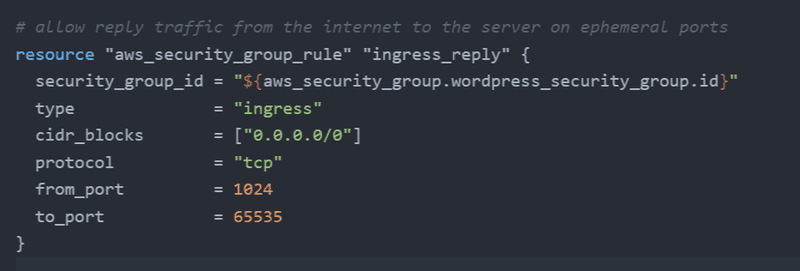
We'll also allow ingress reply traffic from the internet. This will allow replies on ephemeral ports to requests made by the server out to the internet.
We'll allow egress traffic from the server to the internet. This will allow the server to connect to the internet on all ports.

We'll also allow SSH access from our local IP to the server. Note that we are using the local_ip variable here to define which IP has access.
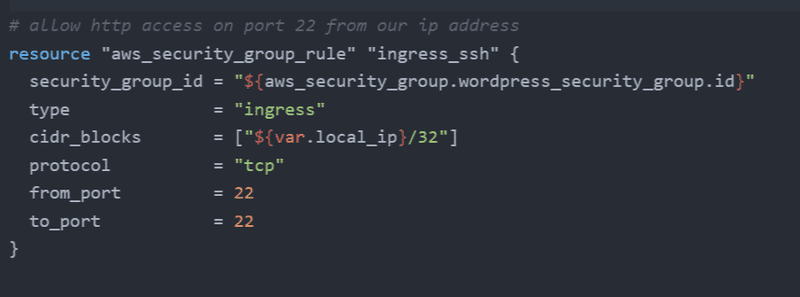
The cool thing about terraform is that now we can go ahead and create those security groups in AWS, i.e. work in an iterative fashion. In a prompt, change to the source code directory and execute terraform plan.
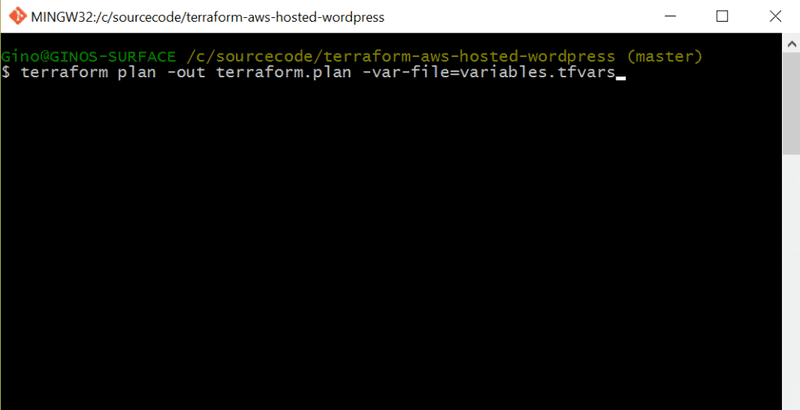
Note the out parameter is used to save the plan file. This is important because you want to apply exactly what was listed in the plan phase. If you don't save your plan, when you apply your changes the underlying architecture may have changed. Be careful however, as the saved plan has some security issues and may store some sensitive information so don't check that into source control.
Now we can apply the plan to create our security groups. Execute "terraform apply terraform.plan" at the prompt. You should eventually get output similar to the following.
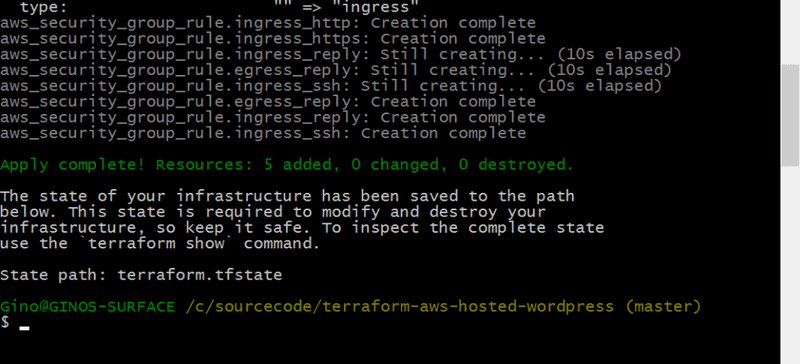
Let's go to the AWS console and verify that terraform is awesome. In the EC2 console for your selected region, verify that the SG is created and has the rules defined.
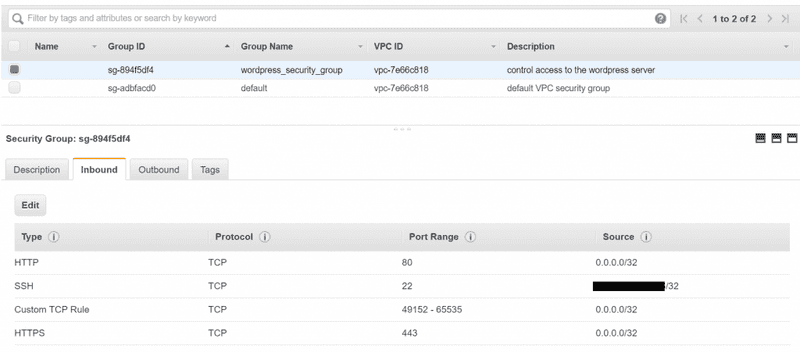
Confirmed, it's awesome. Now let's create our wordpress instance.
Main.tf
We'll create a t2 micro instance that’s free tier eligible, with a 40GB harddrive. This means it should cost about $1 per month on the free tier (https://calculator.s3.amazonaws.com/index.html). We'll also assign our security group we created earlier to the server. We'll also assign a public IP and configure the root_block_device to not delete the volume when the instance is deleted.
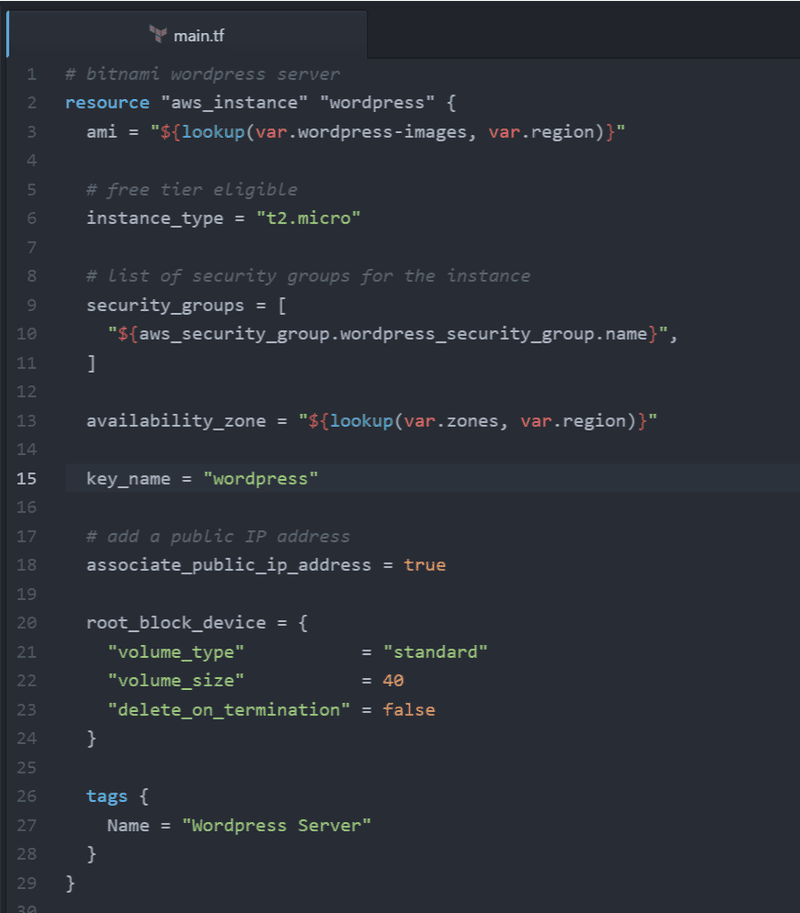
Finally, we'll create an elastic IP so that in the event the server is rebooted, the server will maintain its public IP address.

Before creating the server, lets create some outputs so Terraform will tell let us know what our new server DNS and public IP is. In outputs.tf, define the following output values.
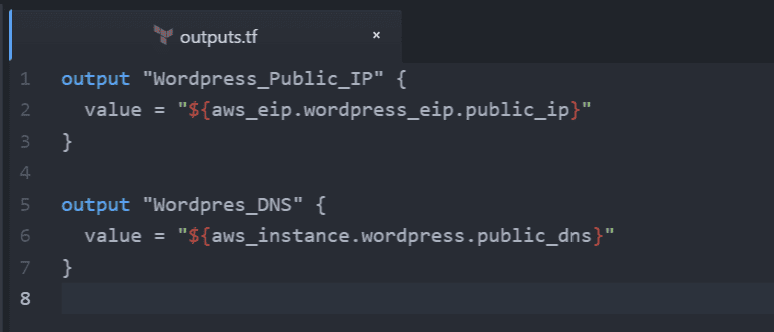
As before, we can now iteratively update our architecture. First execute terraform plan.
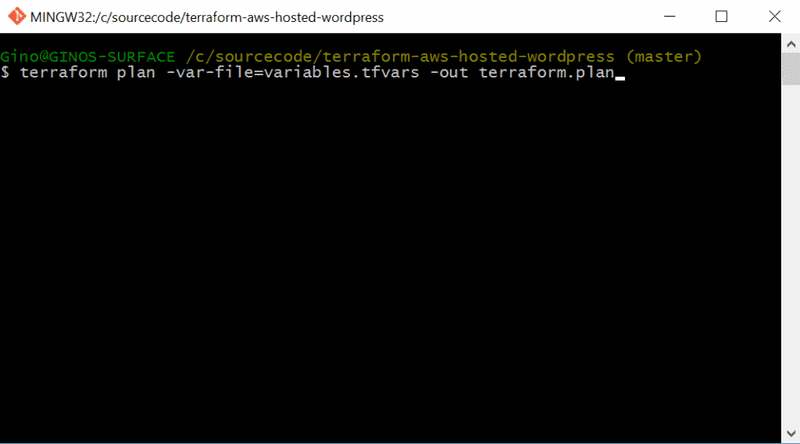
Terraform should report that it will create 2 new resources. Now apply the plan to create the server.
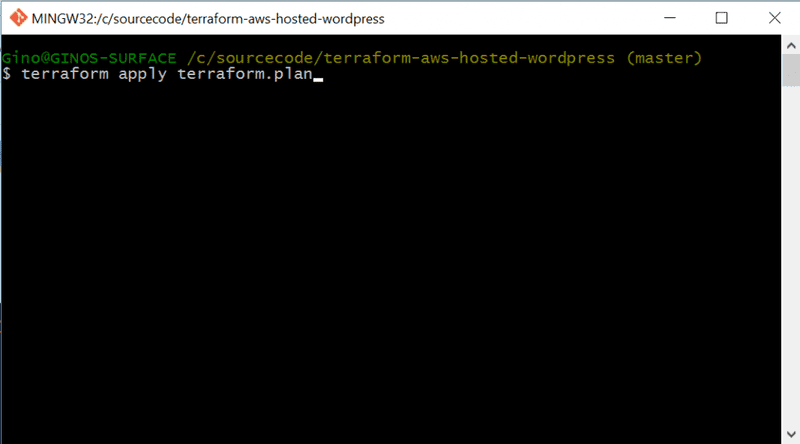
It will take a number of minutes to create the server, but you can check in AWS console if the server creation is in progress, again confirming Terraforms awesomeness. Once TF has finished creating the instances you should see something like:
Outputs: Wordpres_DNS = ec2-[your elastic ip address].compute-1.amazonaws.com Wordpress_Public_IP = [your elastic IP address]
Let's confirm that TF has created the instance successfully in the AWS console.

We can see here that the instance is created and running. We can also see that our security group is mapped to the instance and that its using our elastic IP address.


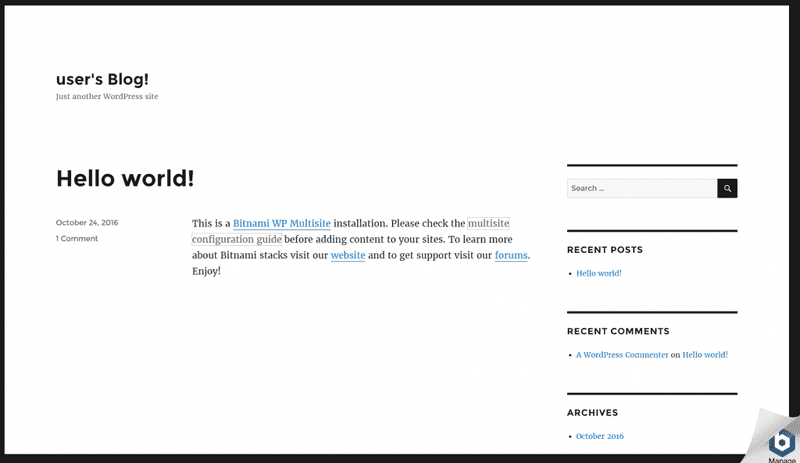
And now we can successfully navigate to the blog using the DNS output by terraform, sweet!
Conclusion
Terraform rocks. You can download the source code for this terraform solution here: https://github.com/ginocoates/terraform-aws-hosted-wordpress

